Sat Feb 19 09:06:42 PST 2011
more water simulation
--- Log opened Fri Jan 28 15:29:35 2011
<JxcelDolghmQ> I just read your water simulation page, and at the end of it, you complain about not having enough computing power. I've got a fast computer, and I'd like to help out. Also I'm a big whiny baby who complains when I'm quoted by cool dudes with awesome biceps.
<bbot> actually I've been thinking about doing a rerender as well
<bbot> let's rock and roll
It seems I have gained a recent fondness for giant month-long projects. I can only hope this one will result in fewer legal threats.
This is a high resolution render test. Really high resolution. 4096x2304, baby! Feel those pixels. With both of us working on it, it took a month to produce under a minute of finished video. I'd calculate how many wall-clock hours it took to produce one simulator-clock second of video, but it'd probably just depress me.
Minimally compressed, the water simulation mesh data took up 11.4 gigabytes. At the end of a month, I had an even thousand PNG files, which took up 13.2 gigabytes. Shuttling data back and forth was an adventure, due to an early, and disastrously stupid, decision made by me to do the water simulation on my computer, then SFTP it to jxcel. The finished video is 243 megabytes large, and 40 seconds long. Here's the .blend file.
Notice the big obvious flicker seven seconds in? There's an interesting story behind that, but to tell it, I have to wander off on a little digression.
The obvious, intuitive way of producing 3D computer graphics is to model the passage of every single photon as it leaves a light source, is absorbed by objects and walls, and reflected by shiny objects.
While obviously intuitive, this method is also computationally infeasible, to put it lightly. Not one in ten thousand photons will intercept the comparatively tiny camera object, thus requiring untold quadrillions of photons to render an image of any reasonable resolution, with most of those photons wasted in reflections or absorptions not even visible to the camera.
Since all we care about is photons that intercept the camera, we can flip the lighting model on its head, and have the camera itself project photons. When one of our camera photons (called rays to distinguish them from normal photons) hits a surface, it checks to see if it can draw an unbroken line between it and a light, and if it can, shades that pixel depending on how far away it is from the light, and the color of the surface. And so on, for dozens of special cases (partially reflective surfaces, surfaces that emit light, subsurface scattering, etc) and fiddly tricks computer scientists have thought up in the 40 years since ray tracing was invented.[1]
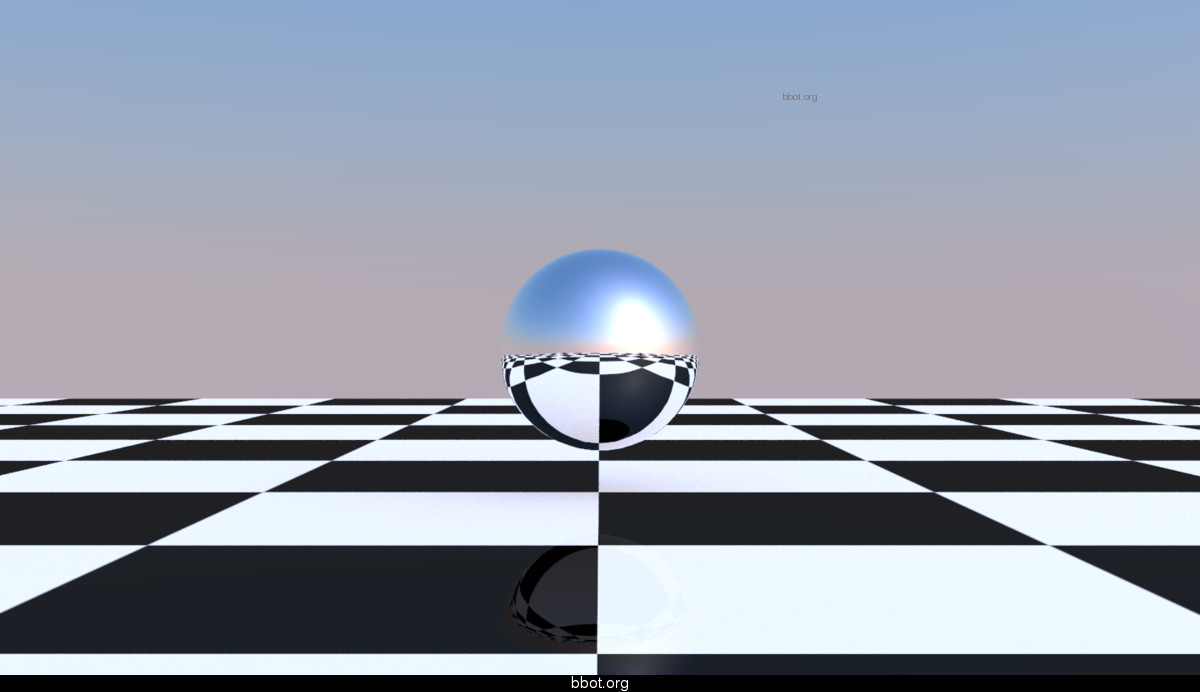
One of the neat tricks of ray tracing is that it's very easy to do accurate reflections, (You just have the ray bounce off the object, then do the normal lighting calculation when it strikes a normal object) which is tedious and annoying to implement in raster rendering,[2] and is why ray tracing demos always have big reflective spheres in them. Like this one, which I whipped up in a couple minutes.[3] (Source file.)
This is a very simple scene, with only two reflective objects in it.[4] Even so, the problem is visible, if you're careful, and know what you're looking for. To make it more obvious, I added a couple more reflective spheres, and moved the camera:
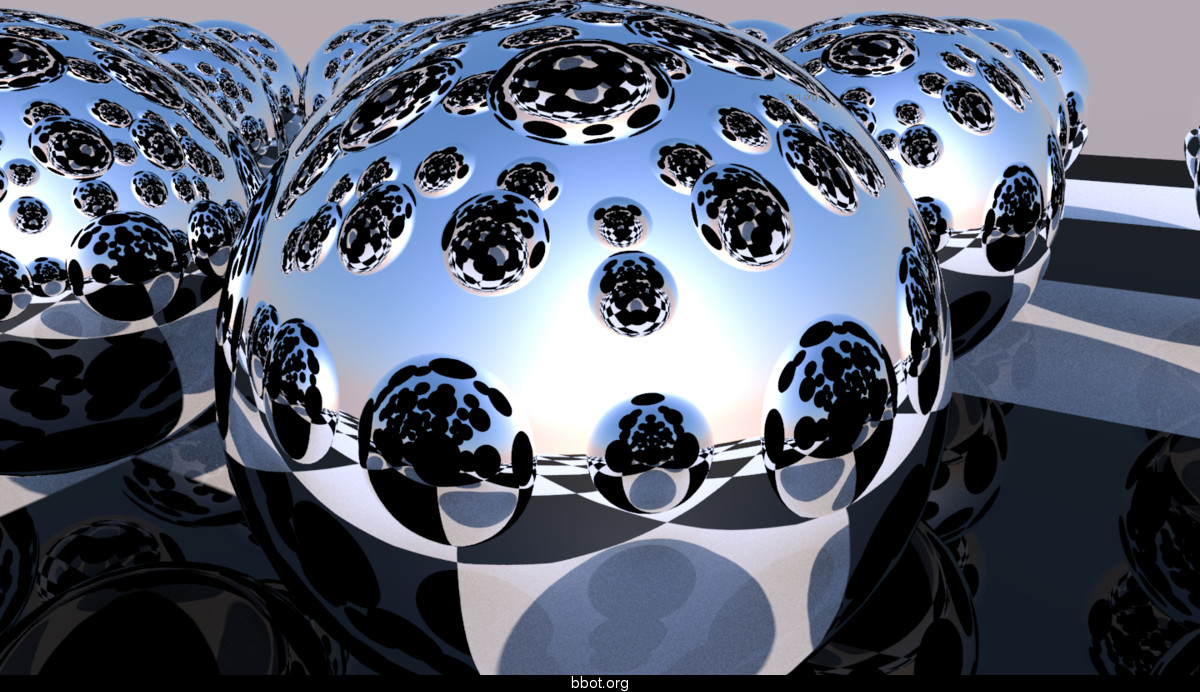
Splotches, everywhere!
This is because, with reflections, its easy for the raytracer to produce a combinatorial explosion, spending hours following rays bouncing a hundred times between surfaces, that only show up in a couple pixels of detail.
To avoid this problem, you can control how many times a ray will bounce before yafaray will give up and just color the pixel flat black. In the first test, the raydepth was only 2, which was a reasonable setting for a simple scene with few reflective objects, but failed spectacularly when you clutter it up with reflective spheres, then butt the camera right up against a mirror. Here's the same scene with a raydepth of 3:
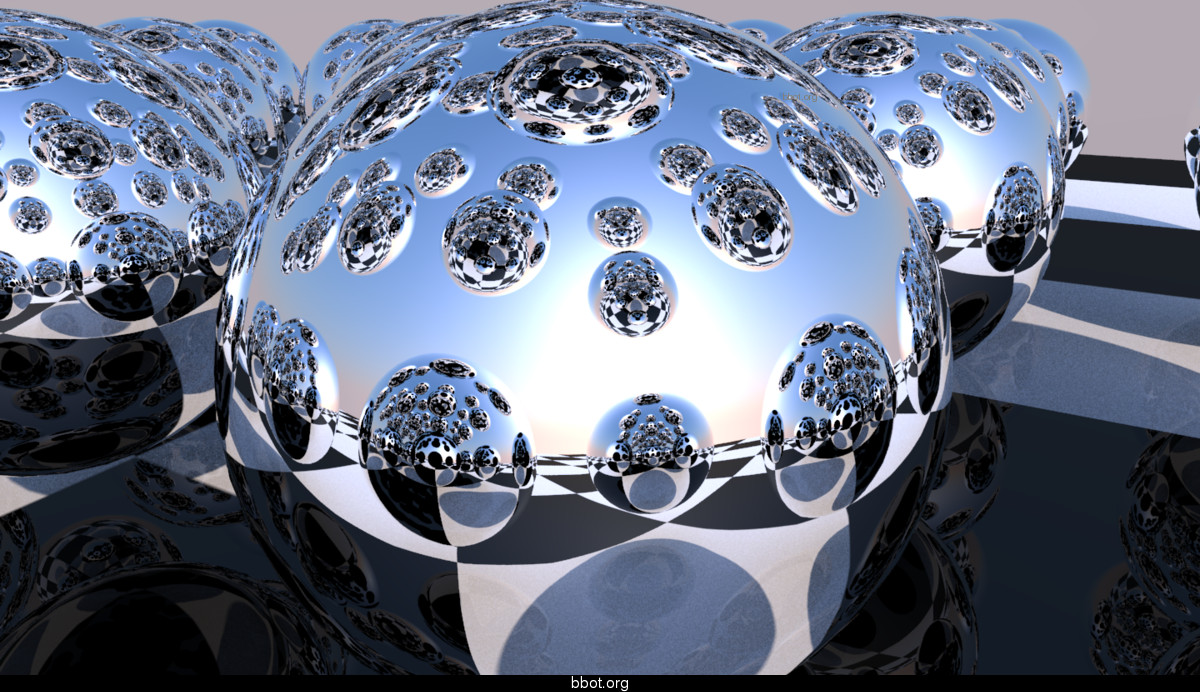
Much better, but there's still raydepth artefacting. This render also took 445 seconds, as opposed to the 372 seconds of the other scene.
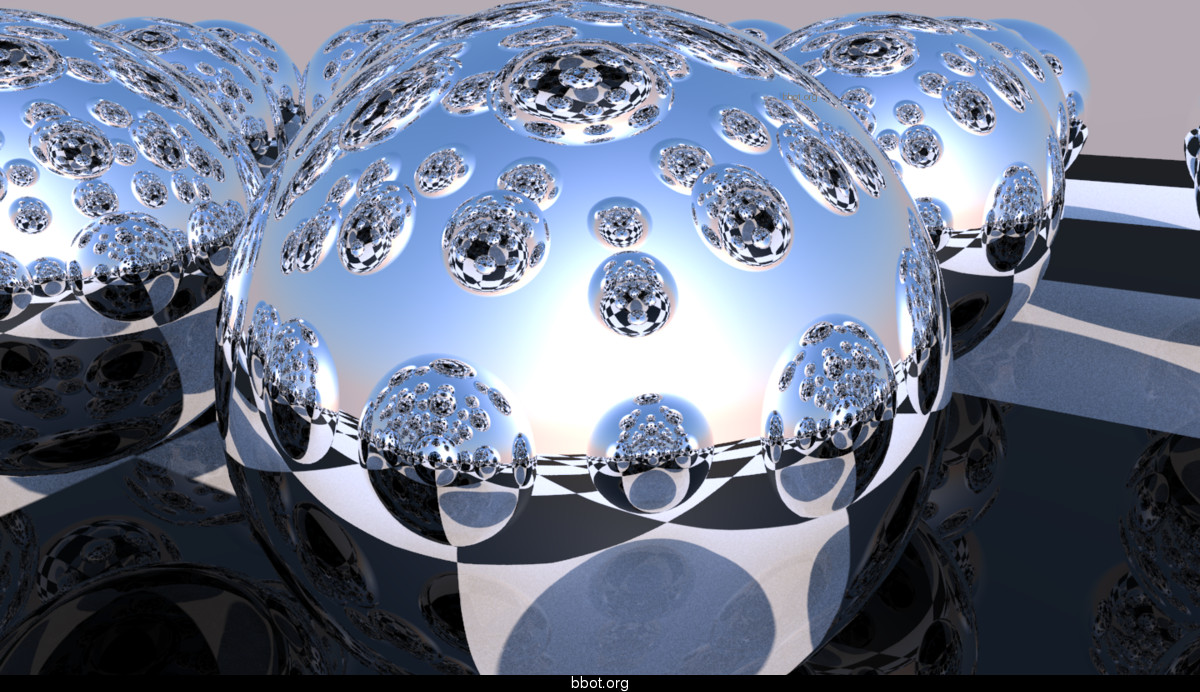
Raydepth 4, 503 seconds.

Raydepth 10, 591 seconds. This image is more or less perfect. There's still artefacting somewhere, of course, since the ray can't bounce forever, but the multisampling covers it up.

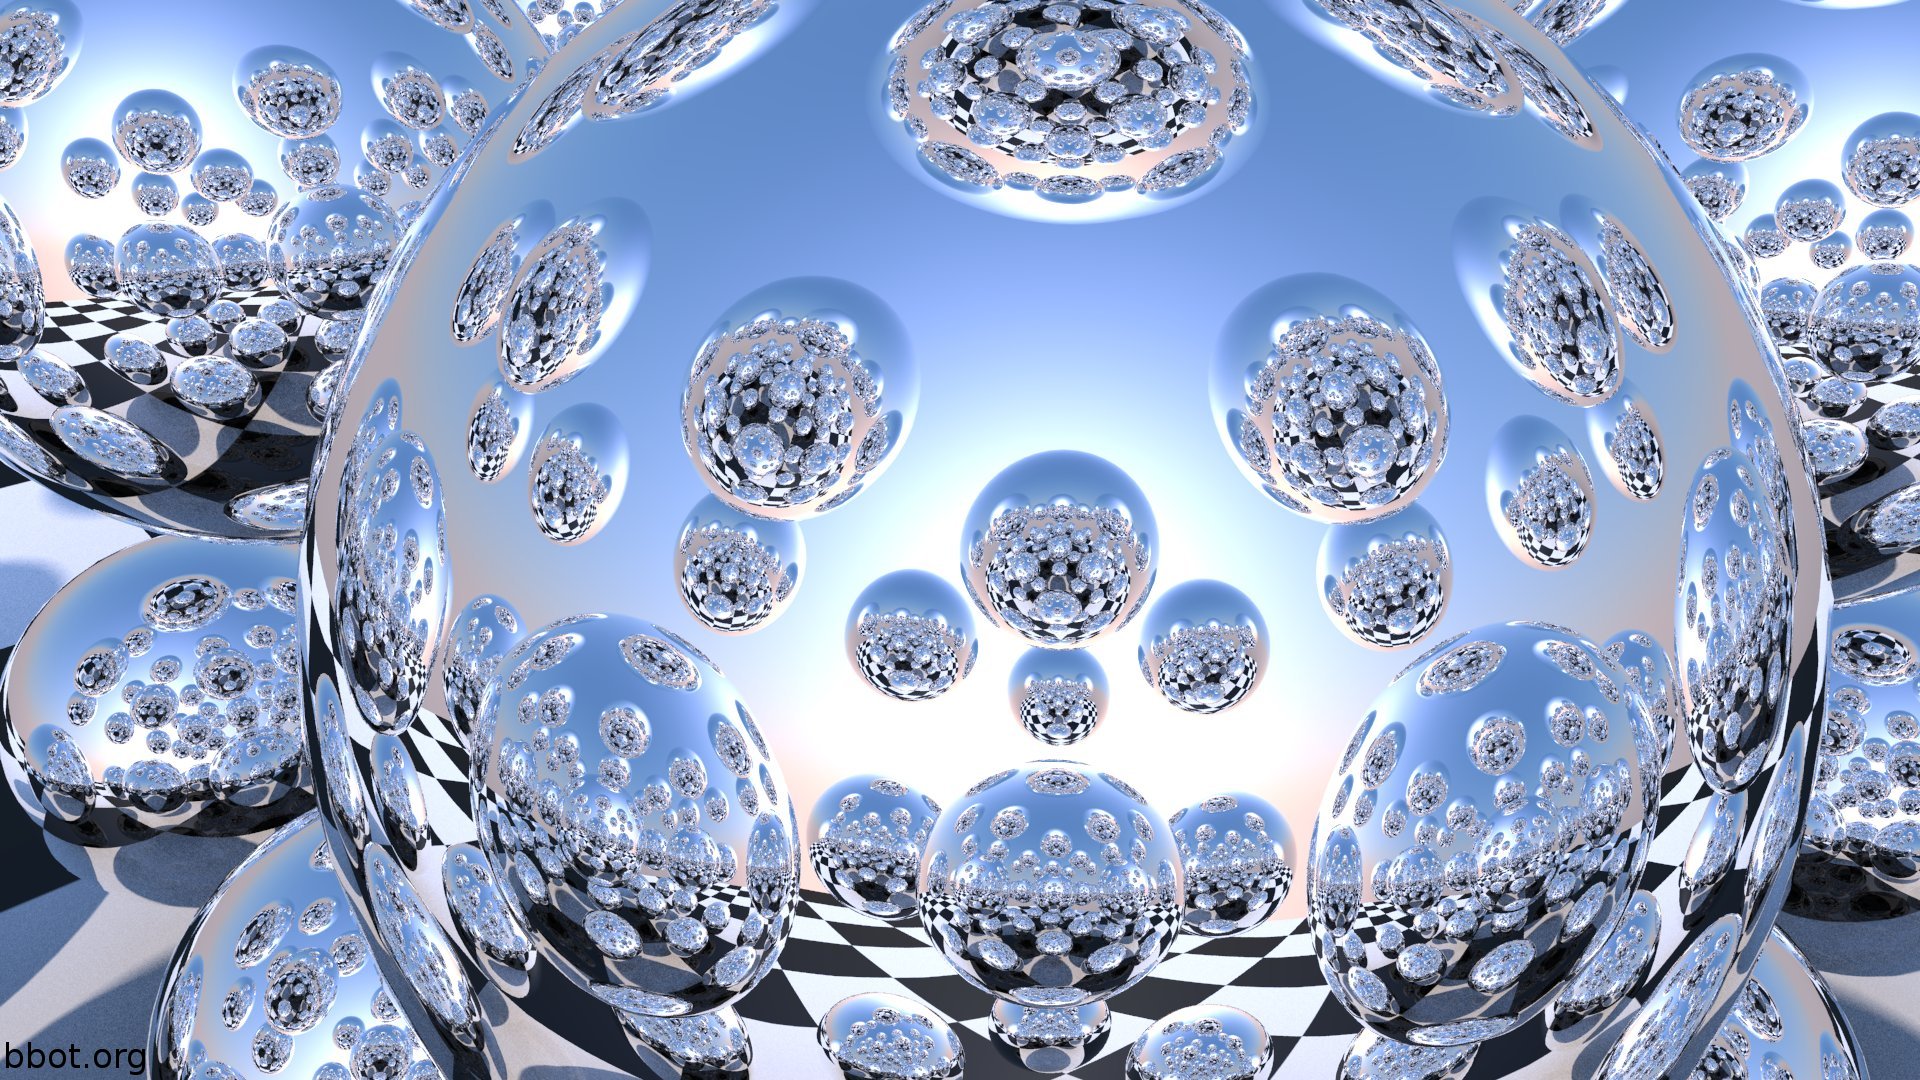
Raydepth 20, 595 seconds. This is as high as the windows interface for yafaray goes, and even in this highly contrived test setup, rendered at high resolution, it's indistinguishable from raydepth 10. For the vast majority of scenes, setting raydepth to 20 is just a magic "go slow" button.
But the water sim isn't an ordinary scene. It's got hundreds of reflective, transparent objects, and it's rendered at a dick punchingly high resolution. The flicker in the video is when jxcel noticed that even at a raydepth of 8, we were getting really obvious artefacting, so we switched to raydepth 20, which probably made it more obvious, but oh well. And even at 20, it's still visible. If you squint, you can see raydepth artefacting in the original renders from 2008, but the pathetically tiny resolution covered up a lot of sins.
So the second test will either have clever camera angles to make up for the problems of the renderer, or slightly less splashing. I'll also step it down to stereoscopic 1080p, maybe even with a (gasp) moving camera object. Now we're cooking with gas!
(Want a desktop-sized render of the sphere test? No problem.)
1: One of those fiddly tricks is that there really is no cheap and simple way to simulate caustics, that is, light bent and distorted by passage through a transparent object. And so we return to our old friend, photon based rendering. The job is simplified greatly by the fact that we don't have to cast so many photons to guarantee an interception with a camera, but only to light the scene normally. The renderer keeps track of where photons bounce off objects and land, and uses this information (after some statistical tricks) to generate a photon light map. This is added to the normal lighting step, and presto, caustics.
2: Not counting some comical misunderstandings between yafaray and blender, until I established that blender was scaling up my beautifully economical 2x2 checkerboard texture the way I wanted it to, (Viz. stupidly, with no interpolation, thus preserving the razor sharp borders between black and white) while yafaray was being far too clever by half and assuming that I wanted my four pixel texture to be interpolated, which turns pixel art into a blurry mess, forcing me to use a much larger 256x256 texture. Absolutely classic premature micro-optimization on my part.
3: One of the most common dodges, as used in the Source engine, (with which I have some experience) is cubemapping. You place cubemap entities, then, in game, run a command that teleports the player (or rather, the player camera) to each entity, then takes six screenshots in +/- x, y, z. The engine then takes this cube map and uses it to approximate reflections on glossy surfaces. This is beautifully fast, but has some problems:
Firstly, they're small, since you'll have hundreds of cubemaps per level. Each face will be maybe 256x256, so you don't get the flawless tack sharp reflections of raytracing. Secondly, they're entirely static, so if there's a TV, or a big piece of moving machinery, it'll be animated in the world view, but frozen in the reflection, and it won't show NPCs or other players. Thirdly, they're taken from one location, so if the player is carrying a reflective object, the reflection won't move at all.
These all sound like pretty bad tradeoffs, but remember: Source is a realtime engine. You can take hundreds of seconds to render a single frame in Yafaray, sure, but in Source you only get sixteen milliseconds.
4: In fact, there are only three objects total: the sphere, the plane, and the camera. There aren't even any lamp objects, as all the light is coming from the big HDRI texture used as the background.